This is the second of a series of articles covering the essential biomechanical lengths and strengths around the upper and lower leg muscles and joints required for running. This will allow you to simply assess your own running style and decide if you are at risk of overloading a particular area and injuring it. The self-help remedial work for all these areas will be discussed so you can start your own rehab.
These articles will help you to have a better understanding of why things hurt and some of the simple things you can do. It is not a substitute for a proper assessment from a Chartered Physiotherapist with a good understanding of the runner. If in doubt then seek further advice.
Lower Leg – Essential Lengths
This section will cover the length of the calf and how to stretch and mobilise it; the mobility of the ankle joint itself and how to mobilise it and the length of the flexor hallucis longus or big toe flexor.
Calf length testing
There are easy ways to self-assess and an equally easy way to do it badly! To test the calf length on yourself then ask a friend to push your foot up and see how far it goes easily. It should go 10 to 20 degrees beyond 90.
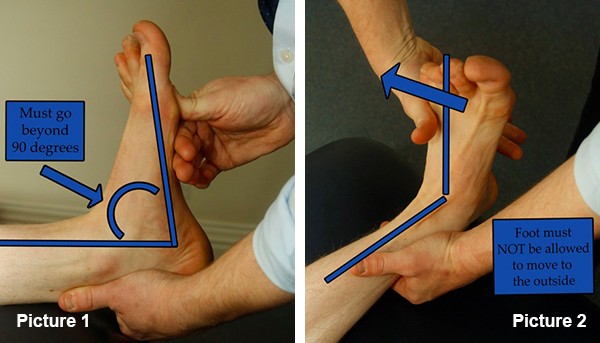
You have to make sure the foot does not twist to the outside as you push (as in Image 2) Allowing the foot to turn out leads to a false impression of good calf length. Keep the knee straight.
Keep the knee straight in the test to see the length of the upper calf. If you repeat the same test but with the knee bent there should be a further increase in range (10 degrees or so).
Calf stretching and mobilising
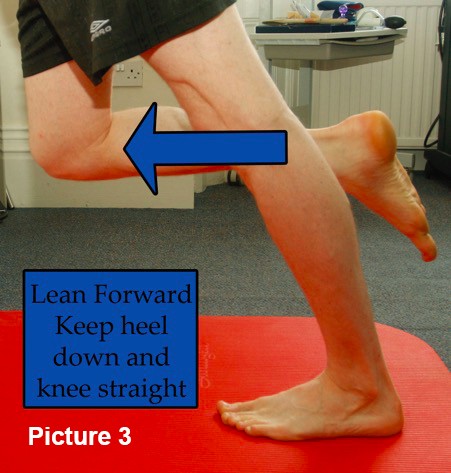
The muscular part of the calf is easily stretched with prolonged holds on stretch of at least 2 minutes, 4 times day. Two minutes may seem like a long time but to alter the actual length of a structure rather than just ease it to is current length then 2 minutes is seen as a minimum.
To correctly stretch the calf you again have to ensure the foot is not rolled in and that the knee is over the top of the foot, not on the inside as you look down. See Picture 4 for an example of a corrcet calf line, and Picture 5 for an example of an incorrect calf line.
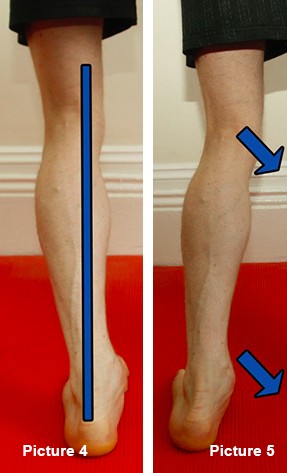
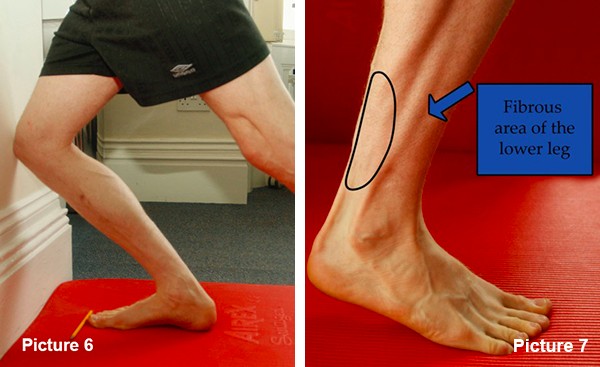
The upper calf is stretched with the knee held straight. The lower calf is stretched with the knee held bent. Important - Still with the knee over the middle of the foot. You can use a marker to measure the distance between the toes and the wall when the kneecap just touches (as shown in Picture 6). Around 4 inches from the wall is normal.
The lower calf is much more fibrous than the upper muscular part and is sometime resistant to stretch (see Picture 7.)
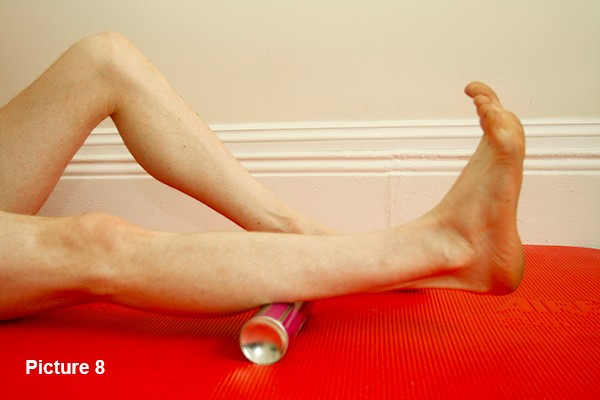
To soften and improve the elasticity of this area the use of a firm foam roller like or an aerosol can. For this lower part of the calf the can is the best way (see Picture 8.) Roll for at least 2 minutes but only a couple of times a day, preferably after a run if you are just working generally. However if you have chronically tight calf muscles then you will need to work really hard on the lower calf to change things. Thus 4 times a day for 2 minutes is not too much – but it will be sore so you will need to ease back on the runs for a couple of weeks whilst you change things.
This area is the place that frequently gets tight from longer runs and if it is allowed to remain tight will alter your running mechanics and lead to injury.
The long toe tendon (flexor hallucis longus) that travels from the deep back of the calf to the end of the big toe can become short and tight, usually as a result of working too hard to stabilise the foot from weak tibialis posterior (medial foot stabiliser).
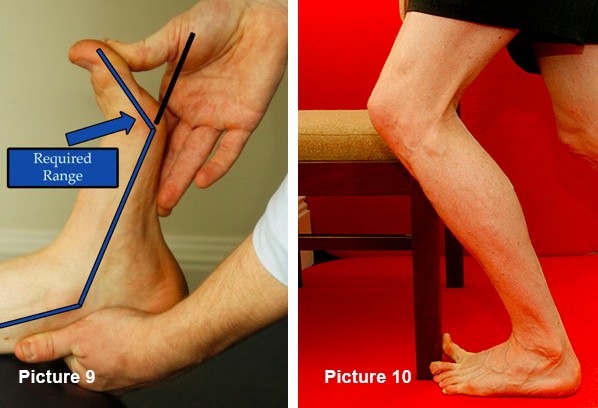
The range is tested by the same foot position as in the calf length test – so foot at 90 plus degrees. The big toe should extend by at least 45 degrees and ideally towards 60-70 degrees - as in Picture 9.
Stretching FHL is best done against a chair leg or door (see Picture 10.) Something you can keep the toe flexed up against whilst bending the knee past the outside edge. Again this requires 2 minutes, twice a day.

.png)

-min.jpg)
