The third section in the four-part series covering the basic lengths and strengths required for running, focusing here on flexibility in the upper leg.
Upper leg lengths
The front of the hip has several groups of muscles. The ability of these, and the hip, to lengthen or extend sufficiently to allow the leg to travel behind you without pulling on the front pelvis excessively is essential for a good controlled stride length. This also reduces pressure on the back. The ‘Thomas Test’ is a classic way of assessing this flexibility.
Hip mobility/flexor length - The Thomas Test
Sitting on the end of a solid table, physio bed or kitchen unit, roll backwards onto your back and hug one knee to your chest. This should keep your back down to the surface. You want the back to be neutral not arched or flattened.
Allow your other leg to hang down towards the floor - it should easily drop to level with the end of the bed/table, if not below (see Picture 1.) The knee should bend by around 80 degrees. This shows good length of the hip flexors and the main quad, the rectus femoris.
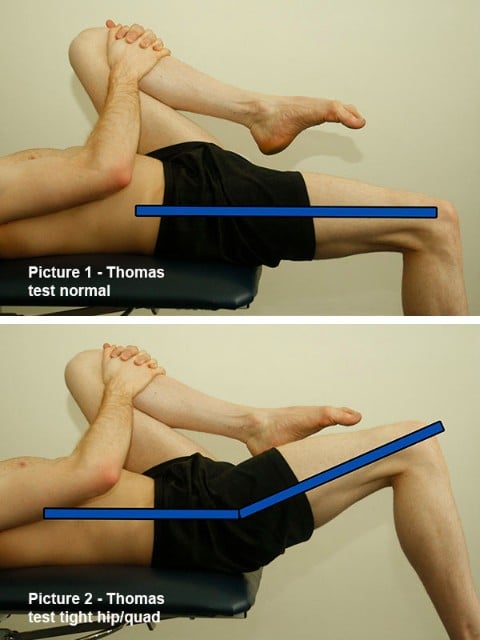
If it doesn’t, and it looks like Picture 2, you should look to stretch the hip flexors as in Picture 3 and the Rectus Femoris shown in Picture 4 for two minutes and four times daily to alter their length.
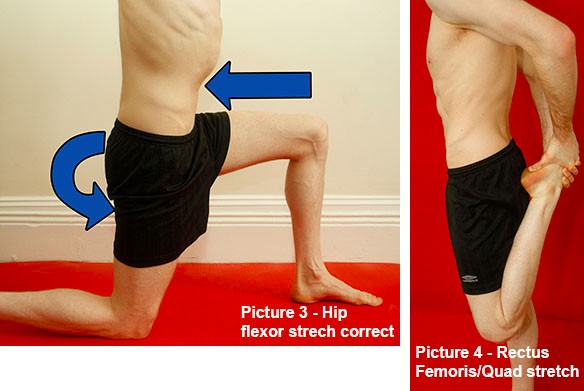
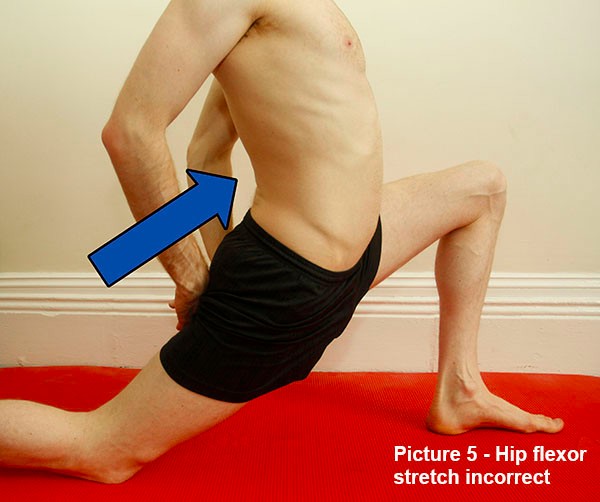
Be certain to keep the tummy tight and do not allow the pelvis to tip forward and back to arch when stretching the hip flexor or it will be ineffective (Picture 5). The stretch should be felt in the front of the hip and the thigh respectively.
Hip mobility - iliotibial band length
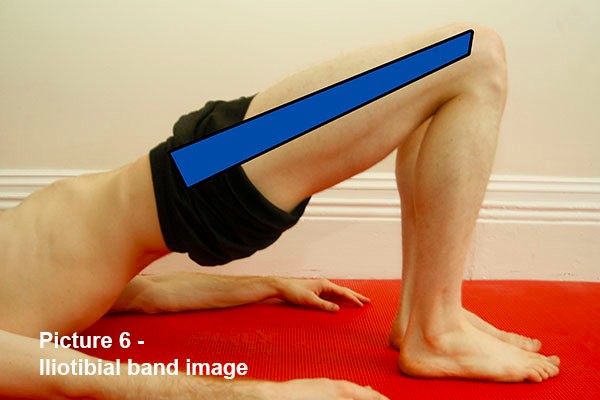
The Iliotibial band (ITB) is a fibrous structure that starts at the top, outside side of the hip and runs down the outside of the leg to the knee (see Picture 6.) Its job is to act as a spring. When our leg is behind us it is put on stretch and then when we lift the foot off the ground it pulls the leg forward like an elastic band. However, if it becomes short and less elastic than it could be then it can cause increased friction around the knee and hip leading to inflammation and or pain. Shortness also leads to the knee dropping inside of the foot and increasing pronation which can lead to many issues.
Tightness in this structure is not easily felt as it has few stretch nerve endings. So whilst you know when a muscle is tight, it is difficult to know when the ITB is. It is also a tough one to test. The Obers Test is the classic way, but you need to be precise to be sure of the result.
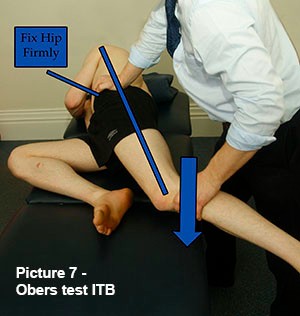
The patient lies on their side with the leg to be tested uppermost. The bottom knee is bent up. The tester takes the upper leg by the knee with one hand and places the other hand on the hip to keep it stable (as in Picture 7.) It is important that this ‘hip’ hand fixes the hip and pelvis firmly.
The hand holding the knee lifts the leg horizontally backwards so that there is a straight line from the shoulder through the hip to the knee. The leg must be kept turned out so that the toes are at least horizontal, if not pointing up towards the ceiling. The knee can be bent 20 degrees or so. With the patient relaxed, lower the leg to the floor/bed without rolling in or flexing at the hip. Keep that straight line! The knee should easily touch the bed. If you meet resistance as you lower the leg and it seems to hover then you have a tight ITB.
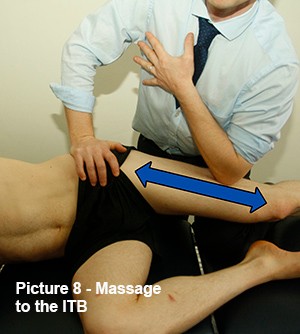
The most effective way of lengthening the ITB is by using a spray can, a rolling pin or a foam roller. The position is shown in Picture 8. If it does not hurt then you are in the wrong place! You need to roll for at least two minutes and four times a day to get the best result. If you have a ‘friendly’ assistant you could ask them to mobilise it as well with a firm massage. It will also be painful! A few minutes a day will suffice.
There has been some discussion in the public domain about the ability to lengthen the ITB with rolling. The point about the ITB is that we are not really trying to lengthen it just increase its elastic properties so that it functions correctly. Rolling is effective for this – far more than stretching.

.png)

-min.jpg)
